फील्ड रिपोर्ट
Mastering Realistic Animal Fur with Pastels: A Comprehensive Guide
Creating lifelike animals in pastel can be a significant challenge if you lack a clear method for rendering fur. Many artists feel overwhelmed by the sheer volume of individual hairs, but the secret to success lies in simplification. By dividing the process into manageable stages, you can move from a flat sketch to a rich, three-dimensional portrait.
Mason Hartley
लेखक
प्रकृति नोट
नीचे पूरी वन्यजीव कहानी या रिपोर्ट पढ़ें।
विषय
वन्यजीव
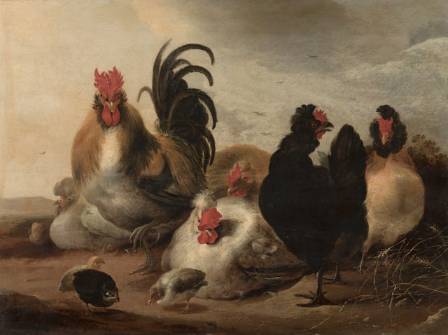
Creating lifelike animals in pastel can be a significant challenge if you lack a clear method for rendering fur. Many artists feel overwhelmed by the sheer volume of individual hairs, but the secret to success lies in simplification. By dividing the process into manageable stages, you can move from a flat sketch to a rich, three-dimensional portrait.
A Three-Stage Methodology for Fur
To achieve professional results, approach the fur in three distinct layers:
-
Foundational Tone: Begin with a base layer of color and value. It is helpful to make this stage slightly darker than the intended final result. This ensures that the lighter highlights applied later will stand out against the background.
-
Shadow Textures: Identify the recessed areas where individual hairs overlap or separate. Adding these small patches of darkness creates the illusion of depth within the coat.
-
Detailed Highlights: In the final phase, apply the lightest hairs on top of the established base. This stage often requires four or five successive layers to build up the density and realism required for a convincing finish.
Essential Tools and Materials
The quality of your surfaces and pigments directly impacts your ability to layer effectively.
-
The Ideal Surface: For high-detail work, a specialized surface like Clairefontaine Pastelmat is recommended. Unlike traditional sanded papers, which can produce excessive dust and make fine detailing difficult, these boards allow for numerous layers without losing "tooth." Choosing a mid-tone paper (such as grey or brown) is also advantageous, as it allows both light and dark strokes to be visible immediately.
-
Pigment Selection: A combination of soft pastels for broad areas and pastel pencils for fine detail works best. Blending can be achieved with a clean finger for a soft look or a paper stump for more precise smudging.
-
The Question of Fixatives: While many artists avoid fixatives because they can darken tones, modern sealing products can be used to lock the underlayers. This allows you to work on top of a full surface without the risk of smudging the foundational colors.

Technique Focus: Rendering Soft Dog Fur
When drawing softer coats, the relationship between the subject and the background is vital. Establishing at least a portion of the background early helps you accurately judge the tonal values of the animal.
-
Initial Transfer: Always transfer your sketch rather than drawing directly on your final surface to avoid damaging the paper with erasers. Avoid placing dark mid-tones under areas that are meant to be pure white.
-
Smoothing the Base: Use pastel pencils or soft pans to block in the initial colors. Gently rub the pigment in the direction of the fur growth with your finger. This beds the pastel into the paper’s fibers and creates a smooth foundation. Work from the elements furthest away (like the ears) toward those closest to the viewer (the nose).
-
Strategic Focus: You can guide the viewer's eye by varying the sharpness of your details. For example, keeping the eyes in sharp focus while slightly blurring the texture of the nose creates a professional, photographic depth of field.
Technique Focus: Constructing a Thick Lion’s Mane
Thicker fur requires a different approach to account for its volume and the way it traps light. Because thick manes are composed of many layers, the artwork must be built up carefully to avoid a flat appearance.
-
Blocking Vibrant Tones: Use high-pigment soft pastels to establish the boldest colors first. This prevents the colors from becoming "muddy" as you add subsequent layers.
-
Mapping Growth Direction: Before adding highlights, map out the darkest shadows between the hair clumps. It is crucial to follow the natural flow of the mane, as this directional work defines the underlying anatomy and shape of the lion.
-
Natural Mark-Making: When adding final hair details with sharp pencils, vary the angle and rotation of your hand. Avoid creating perfectly parallel lines; instead, aim for slightly irregular, overlapping marks to mimic the natural, unregimented look of real animal hair.

इसी जंगल से और

· en
Most Beautiful Coastal Cities in the World
Julian Cross

· en
Neuschwanstein Castle: A Comprehensive Exploration of Germany’s Fairytale Gem
Logan Matthews

· en
USB Type-C: Understanding Its Function and Why It Became the Universal Choice
Emma Thompson

· en
Bionic Hands in Action
Lily Monroe
· hi
सौर मंडल और आकाशगंगा की सीमा का एक व्यापक अवलोकन
प्रवीण सांगवान
· hi
इन 20 सामान्य पक्षियों से मिलें
प्रिया